Horaizon Orthopedic Implants
How to Determine the Shelf Life of Orthopedic Implants?
The shelf life of an orthopedic implant is more than a printed expiration date. It reflects whether the device remains sterile, mechanically stable, chemically unchanged, and correctly packaged until implantation. The FDA’s guidance on sterile medical-device packaging stresses that manufacturers must validate package integrity throughout the claimed shelf life. ASTM F1980 also recommends accelerated-aging studies, followed by real-time aging confirmation. These tests examine seal strength, barrier performance, corrosion risk, and material degradation.
What factors affect the shelf life of orthopedic implants? Packaging materials, sterilization methods, storage temperature, humidity, light exposure, and implant composition all matter. Titanium, cobalt-chromium alloys, ceramics, polymers, and coatings may respond differently over time. A scratched tray, a failed seal, or repeated temperature changes can create risks that are not visible during a quick inspection. The FDA’s 2023 Medical Device Supply Chain and Shortages reports also show why dependable storage and distribution controls remain important for device availability and quality.
Dr. David A. Robinson, an orthopedic implant researcher, has noted, “Shelf life must be demonstrated, not simply assumed.” That principle is easy to overlook. Manufacturers should combine accelerated aging, real-time testing, sterilization validation, packaging studies, and post-market complaint data. ISO 11607 and ISO 14971 provide useful frameworks for packaging validation and risk management. Still, no single test answers every question. Clinical handling, warehouse conditions, and human error may change the practical risk. A defensible shelf-life decision therefore requires evidence, traceability, and periodic review—not confidence alone.
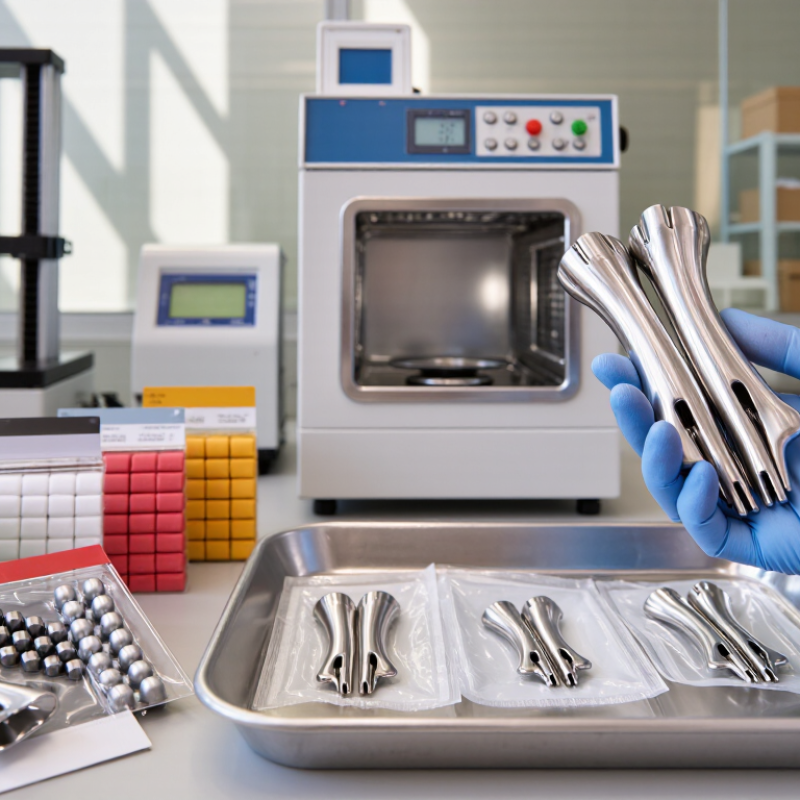
Shelf life for an orthopedic implant is the period a sealed product remains safe, sterile, and functional before implantation. It is not the same as service life inside the body. An implant may remain mechanically suitable for decades after surgery, while its unopened package may expire much earlier. This distinction prevents serious storage mistakes.
The U.S. FDA’s medical-device guidance emphasizes evidence from packaging, material, and functional testing. ASTM F1980 commonly uses a Q10 value of 2 for accelerated aging. In practice, this estimates a twofold reaction-rate change for every 10°C increase. A package aged at 55°C for 180 days may represent roughly one year at 25°C. However, that estimate requires real-time confirmation. It is not a permanent substitute.
ISO 11607-1 also requires packaging systems to maintain sterility until use, transport, and handling. Testing may include seal strength, visual inspection, microbial barrier performance, and implant functionality. For a porous titanium component, tiny package punctures or moisture exposure can matter more than the printed date. Storage records should track temperature, humidity, lot number, and package condition. A damaged box needs evaluation, even when the expiration date remains valid. The difficult part is uncertainty. Accelerated aging can overlook slow changes in coatings, polymers, or labels. Engineers should review real-time data regularly and revise the shelf-life claim when evidence disagrees.
How to Determine the Shelf Life of Orthopedic Implants?
Shelf life begins with accurate material identification. Titanium, stainless steel, cobalt-chromium alloys, PEEK, and polyethylene can age differently. The implant itself may remain chemically stable, while its sterile packaging becomes the limiting factor. Check the material certificate, manufacturing record, and approved product documentation. Do not rely on color or surface appearance alone. A polished implant can still have an incorrect label.
Review every component in the package. Screws, plates, spacers, coatings, and fixation accessories may use different materials. Mixed-material assemblies require compatibility data and validated sterilization information. Confirm the lot number, production date, sterilization method, and stated expiration date. A missing record should trigger investigation, not assumption. Small parts are easy to overlook.
Packaging often determines the practical shelf life. Inspect the sterile barrier, seals, trays, lids, and protective wraps for punctures, crushed corners, moisture, or broken seals. Storage conditions matter. Excessive heat, humidity, dust, and repeated handling can weaken packaging before the printed date. Keep records from routine inspections. A clean package is not automatically a safe package. The date is important, but validation evidence matters more. When documents conflict, quarantine the item and request a documented technical review from the responsible quality team. I may be overly cautious here, but visual checks alone are imperfect.
Storage conditions can change an orthopedic implant’s usable life, even before its printed expiration date. A clean, dry room is not enough. Temperature, humidity, light, dust, and chemical vapors all require control. Most facilities should maintain stable temperature and relative humidity within documented limits. Sudden changes matter too. Condensation can form inside damaged packaging.
Keep implants away from sinks, exterior walls, direct sunlight, and heating equipment. Store packages on clean shelving, never on the floor. Leave space between cartons and walls for inspection and airflow. A crushed corner, torn pouch, wet label, or broken seal should trigger quarantine. Do not rely on appearance alone. Packaging can look acceptable while its barrier has weakened.
Environmental records should support every shelf-life decision. Review temperature and humidity logs, transport history, sterilization status, and lot traceability. A trained quality professional should inspect storage areas at planned intervals. I have found that small gaps in records create large uncertainties later. That weakness deserves attention. When conditions exceed approved limits, assess exposure duration, packaging type, and manufacturer stability data before release. If evidence is incomplete, extending use is difficult to defend. A conservative decision protects both implant performance and patient safety.
Determining an orthopedic implant’s shelf life starts with manufacturer data. Review the product label, instructions for use, lot number, and stated expiration date. These details reflect documented stability testing, including packaging integrity, material performance, and sterilization protection. Do not assume the implant remains safe because it looks unused. A sealed tray can still be affected by heat, moisture, or damaged barriers.
Relevant standards add useful structure. Requirements for sterile barrier systems, storage conditions, and quality control help explain how shelf life was established. However, standards do not replace the manufacturer’s validated data. Check whether the implant requires controlled temperature, limited humidity, or protection from direct light. A practical inspection should include torn pouches, broken seals, rust, discoloration, and missing labels. Small defects matter.
How to Determine the Shelf Life of Orthopedic Implants?
An implant’s expiry date is only one part of its safety story. Inspect the outer carton, sterile pouch, and protective seals before use. Look for tears, punctures, moisture, stains, or crushed corners. Check the lot number, expiration date, and product description against the surgical record. A clean package can still contain a documentation error.
Storage history also matters. Confirm that the implant stayed within the required temperature and humidity ranges. Review warehouse logs, transport records, and any temperature-monitoring data. The instructions for use should match the implant’s material, design, and intended procedure. Never rely on memory. Small differences can matter.
Keep a clear chain of records. It should connect the implant to the patient, procedure, lot number, inspection findings, and staff approval. If the label is unreadable, the seal looks weak, or records are incomplete, place the item in quarantine. Do not open it to “take a closer look.” A qualified healthcare professional should resolve the issue through approved procedures.
A checklist helps, but it is not flawless. Human fatigue can cause missed details, especially during busy surgical schedules. Photographing damaged packaging may support internal review, where permitted. Document the decision and the reason behind it. Safety depends on both physical condition and reliable evidence.
| Inspection or Documentation Dimension | What to Verify | Typical Evidence or Acceptance Criteria | Required Action Before Use |
|---|---|---|---|
| Labeled expiration date | Confirm the use-by date printed on the sterile barrier, package label, or accompanying documentation. | The date is legible, has not passed, and matches the applicable lot or catalog reference. | Do not implant an item beyond its labeled expiration date unless the applicable regulatory and quality system formally permits a documented extension. |
| Shelf-life validation basis | Determine whether the stated shelf life is supported by real-time or accelerated aging studies and package-integrity testing. | Validation records address sterility maintenance, seal strength, material stability, labeling durability, and functional performance through the claimed period. | Use the approved shelf-life period specified in the device documentation; do not infer shelf life from appearance alone. |
| Sterile barrier integrity | Inspect pouches, trays, lids, seals, caps, and protective barriers for punctures, tears, open seals, delamination, or compromised closures. | Packaging is fully closed, dry, clean, and free from visible damage, holes, abrasion, or seal separation. | Treat compromised sterile packaging as non-sterile. Quarantine the item and follow the facility's deviation procedure. |
| Storage conditions | Compare recorded temperature, humidity, light exposure, and storage location with the product's labeled requirements. | Environmental records show that the device was stored within the specified limits and protected from moisture, direct sunlight, contamination, and excessive handling. | Investigate excursions. Do not release the implant until quality personnel assess the potential effect on sterility, materials, and performance. |
| Implant material and surface | Check for corrosion, discoloration, deposits, scratches, deformation, cracking, or unexpected changes to a coating or porous surface. | The implant conforms visually to the approved design and has no damage that could affect fixation, strength, biocompatibility, or handling. | Reject or quarantine any implant with unexplained corrosion, surface damage, deformation, or contamination. |
| Identification and traceability | Verify the device identifier, size, side, lot or serial number, quantity, and package-to-record correspondence. | All identifiers are readable and consistent across the label, inventory system, surgical record, and implant log. | Do not use an unidentified, mismatched, or untraceable implant. |
| Packaging history | Review whether the package has been opened, reclosed, dropped, crushed, exposed to fluid, or subjected to unauthorized repackaging. | Documented handling history shows that the original validated packaging configuration remained intact. | Quarantine any item with an unknown or adverse packaging history until assessed by the responsible quality function. |
| Sterilization status | Establish whether the implant is supplied sterile or requires validated sterilization before use, and confirm the applicable sterilization method. | Sterilization instructions, process records, chemical or biological indicators where applicable, and load documentation are complete. | Never use a device with uncertain sterilization status. Do not resterilize unless the approved instructions explicitly allow it. |
| Instructions for use | Review the current instructions for use for storage, expiration, inspection, cleaning, sterilization, handling, and contraindications. | The current controlled document is available and applicable to the exact device configuration. | Follow the current approved instructions rather than an outdated local copy or informal practice. |
| Recall and safety notices | Search applicable internal alerts and regulatory safety communications using the device, lot, or serial number. | No active recall, field safety corrective action, restriction, or unresolved complaint affects the item. | Hold affected inventory and follow the documented recall or corrective-action process. |
| Stock rotation | Confirm that inventory is managed using first-expire, first-out principles and that older stock is not hidden behind newer stock. | Inventory records show routine checks of expiration dates and appropriate segregation of expired or damaged products. | Remove expired, damaged, or unverified items from available stock and document disposition. |
| Final release decision | Ensure an authorized person reviews the inspection findings and supporting records before the implant enters the operating room. | A documented release, quarantine, rejection, or escalation decision is linked to the device identifier. | Use only after all required checks are satisfactory and the release decision is recorded. |
Shelf life is the period a sealed implant remains safe, sterile, and functional before implantation. It differs from service life inside the body.
Not automatically. Inspect the carton, sterile pouch, seals, and storage records before use. A valid date cannot excuse damaged packaging.
Check for tears, punctures, moisture, stains, and crushed corners. Tiny damage can threaten sterility, especially with porous components. Do not ignore it.
Confirm temperature and humidity stayed within required ranges. Review warehouse logs, transport records, and monitoring data. Missing records create uncertainty.
Match the lot number, expiry date, product description, material, and intended procedure with the surgical record. Small differences may matter.
Place the implant in quarantine and follow approved review procedures. Do not open it for a closer look. Do not guess.
It uses higher temperatures to predict slower changes during normal storage. The estimate needs real-time confirmation and may miss gradual coating or polymer changes.
Records should link the implant, patient, procedure, lot number, inspection findings, and staff approval. Photograph damaged packaging when permitted.
No. Checklists reduce missed details, but fatigue and busy schedules still cause errors. Review the checklist critically. It is not flawless.
Reconsider it when real-time evidence conflicts with accelerated-aging results, packaging tests, or functional data. Safety decisions require evidence, not habit.
Determining the shelf life of orthopedic implants is essential for maintaining their safety, sterility, mechanical performance, and clinical reliability. What factors affect the shelf life of orthopedic implants? Key considerations include the implant’s material, coatings, components, and the type of packaging used to protect it from moisture, oxygen, light, and physical damage. Storage conditions also play an important role, since temperature fluctuations, excessive humidity, contamination, and prolonged environmental exposure may compromise packaging integrity or product performance.
A reliable assessment should include reviewing the manufacturer’s shelf-life data, expiration date, storage instructions, and applicable quality standards. Before use, each implant should be carefully inspected for damaged packaging, broken seals, corrosion, discoloration, deformation, or missing identification details. Staff should also verify the product’s documentation, traceability records, and sterilization status. If any concern exists regarding the implant’s condition or storage history, it should be quarantined and evaluated according to established clinical and quality procedures.
